 Plate MountBlank (Wall)
Plate MountBlank (Wall)
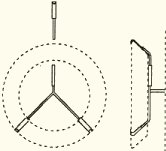
This style Plate MountBlank is used to mount a plate on a wall. Two bottom tabs soldered to a center stem are shaped by you to your plate's profile and support its weight. There is a top tab soldered to a rod that, after being shaped to the plate's profile, slides into a tube to lock the plate in. (See the illustration below.) The center stem installs into the wall.
The Wall Plate MountBlank comes in three sizes, based on the diameter of the object it will easily accommodate :
|
Sizes | |
|
Small (No.22-261W) |
For objects 6" to 8" in diameter |
|
Medium (No.22-262W) |
For objects 8" to 10" in diameter |
|
Large (No.22-263W) |
For objects 10" to 12" in diameter |
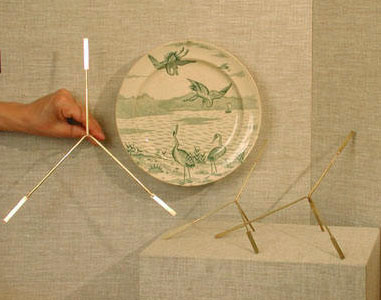
Example: Ceramic Plate
Here are each size of wall-style Plate MountBlank, the object to display and the finished mount.
To identify each mount, hover your curser over each.
Click on the plate to see the details of the mount.
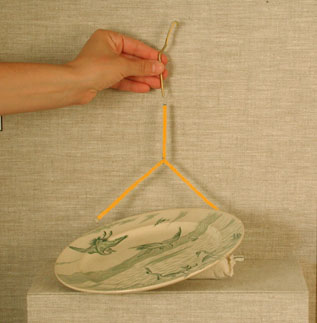
Here you see a step-by-step
of installing your plate into the Wall PlateMount.
We've digitized the felt padding on the mount to be day-glo orange to help it
show up.
|
|
| |
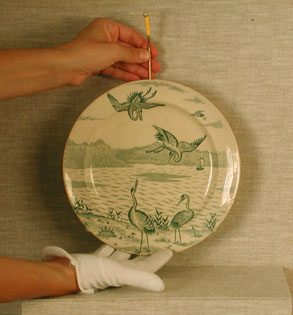
| Step 1. The mount has been formed to the plate. An undersized hole has been drilled into the back wall. The PlateMount stem has been pushed through the hole. The top tab is lifted out of the tube (that's the vertical orange). | Step 2. The plate is positioned into the bottom two tabs. The rod
attached to the top tab is positioned into the tube.
| |
|
|
| |
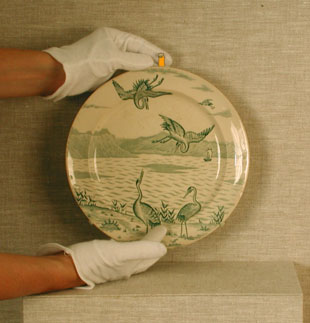
| Step 3. The top tab slides down into place locking the plate in
position. Oh, so simple!
|
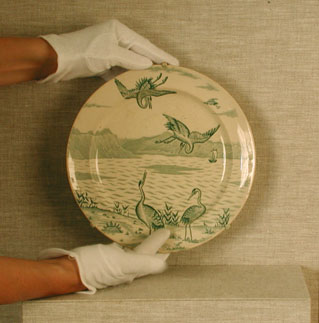
Step 4. I can let go now. If you hover the curser over each tab,
you can click for a close-up. Boy, those tabs are hard to see when
everything is done. |
![]() Benchmark PO
Box 214, Rosemont, NJ 08556 USA
Benchmark PO
Box 214, Rosemont, NJ 08556 USA
Copyright 2004 Benchmark